About Front Range Woodturners
 We are the Denver area chapter of the AAW (American Association of Woodturners) serving woodturners throughout Colorado’s Front Range.
Our Meetings
We meet on the first Tuesday of every month from 6:15 PM to 9:00 PM in the basement of Rockler Woodworking and Hardware, 2553 S Colorado Blvd, Denver, 80222.
Visitors are welcome to join us at one of our meetings to see what we are all about.
Upcoming Demonstrations
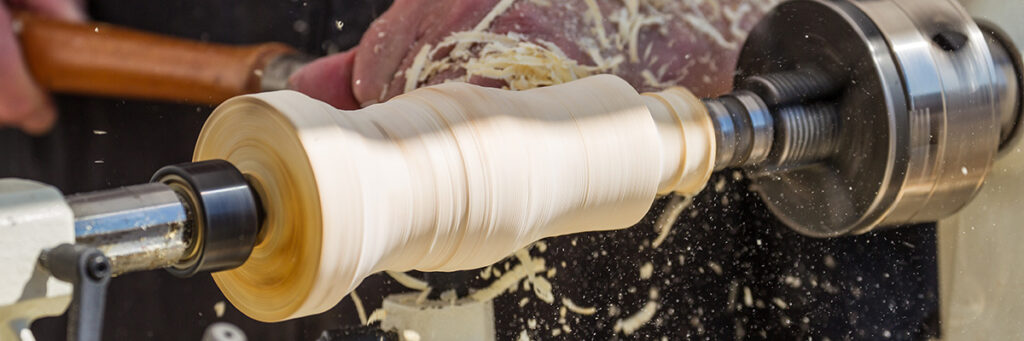
July – Rick Orr – Turning a Perfect Sphere
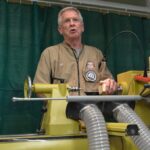
 Rick is a past president of the Front Range Woodturners and this will be his tenth demonstration for the club, not including numerous Brown Bag sessions. He has also demonstrated for the Rocky Mountain Woodturners in Loveland, the Pueblo Woodturners, the Pikes Peak Woodturners in Colorado Springs, and the Yellowstone Woodturners in Billings, MT. Rick is a frequent demonstrator at the Rocky Mountain Woodturning Symposium, and his work was featured on the back cover of American Woodturner in February 2018, highlighting his bamboo fly rod tubes.
Demo Description:
Rick’s demo will cover using the Carter Perfect Sphere Tool to turn a rough blank into a sphere. The demo will include preparation of the blank into a cylinder mounted on a scroll chuck. The blank sphere pattern is then laid out to shape a turnable sphere. The set up of the Carter tool will be discussed in detail as well as the safety aspects of the entire operation. While this project normally requires a considerable amount of sanding, there will be no sanding done in the demo. Rick will also have several completed examples of his work from many different wood species on display and for discussion enjoy turning.
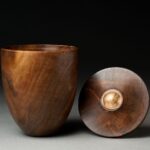
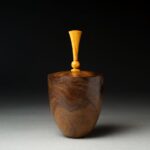
August – Michael Anderson – Spin Top Box with Coin Bearing


Michael Anderson is a woodturner and sculptor based in Chattanooga, Tennessee, known for imaginative, story‑driven bowls and sculptural forms. Working under his own name and the moniker Ulmus Woodturning, he creates pieces that blend traditional turning with carving, pyrography, and painted detail. His work often incorporates narrative elements and interactive surprises, drawing on personal experiences and a deep appreciation for the expressive potential of wood. Anderson primarily uses sustainably sourced domestic hardwoods from storm‑fallen or felled trees in the Southeast, occasionally incorporating exotic species for contrast.
A biology instructor at Chattanooga State Community College, Anderson converted his home garage into a dedicated studio in 2021 and has since become an active voice in the woodturning community. His work has been featured in the Best of Tennessee Craft Biennial Exhibition, and he has demonstrated at national symposia including the Rocky Mountain Woodturning Symposium. Known for his distinctive Shreddies bowls, egg forms, and contemporary interpretations of Hawaiian calabash vessels, Anderson brings together technical skill, creative curiosity, and a commitment to community engagement—earning him recognition as a unique and respected figure in contemporary wood art.
Demo Description:
Let it spin! Boxes are fun pieces of functional art, made even better when the top is more than just a lid. Michael will demonstrate creating a turned box with a lid that also functions as a spin top. As a fun surprise, the spin top will utilize a coin (penny or dime) as a spin bearing. The body of the box is also designed to be a spin platform when turned upside down. This demo involves turning a classical form box, methods for hollowing with thin walls, using a doming block to shape a piece of metal, as well as turning a finial/stem with fine details.
Demonstrators for 2026:
Sep – Steve Newberry (RMWT) – One Piece Teapots
Oct – J.Paul Fennel – Piercing
Nov – Patrick Crumpton – Sea Urchin Ornament w/Painted Interior
Dec – Holiday Party
Member Benefits
- Library – The Front Range Woodturners has an extensive collection of books, magazines, and videos available for members to check out at no cost.
- Demonstrations – Monthly meetings feature an exciting demo given by one of our club members or a professional turner. When available we also offer a full day hands-on class with these renowned turners at a nominal cost.
- Brown Bag Demo – Bring your lunch and watch a free in-person mini demo on a variety of topics in a smaller, more relaxed setting.
- HOW (Hands On Woodturning) – monthly hands-on-classes taught on a variety of subjects from Beginner to Advanced skill levels. HOW classes are free for members.
- Wood Drawing – Members can bring some of their excess (good) wood to a meeting so it can find a new home with a different member. You can never have too much wood!
- Group Buy – Do you want to save money? We have vendor discounts with Internet suppliers, local suppliers, tool and steel suppliers and wood suppliers. Through our deals with these vendors our members can easily earn back the cost of membership!
- Ladies of the Lathe – All female members of the FRW, aged 18 or older, are invited to join the Ladies of the Lathe. LOTL is intended to provide a comfortable, easy-paced, and non-threatening environment for women to learn and advance their skills in turning.
- Mentoring – Members have access to several programs to help increase their woodturning skills. Group sessions are held monthly and one-on-one mentoring on various topics can be arranged with experienced FRW volunteers.
- PHEOG – The Pete Holtus Educational Opportunity Grant program provides grant money to members through an application process. Applicants may request money for woodturning related classes, workshops, or symposium fees.
- Workshop Tours – monthly tour of members workshop. Get ideas and get inspired!
Special Notices
- The FORMS tab (above) has all of our forms in one spot (Group Buy, Membership, Gallery, etc).
- The Turning Challenge for the July meeting is a Mini Bowl (which probably won’t win anything), so better yet is to make a Mini Bowl (Spice Bowl) Matching Set as expertly shown by The Amazing Pat Scott’s June demo.
- Our next Ladies of the Lathe class is June 2nd. Dennis Fanning will teach Yarn Bowls.
NOTE: Starting in July, LOTL is moving to the 4th Tuesday of the month instead of the 1st Tuesday. - Our July Brown Bag Demo (“view and chew,” as Raleigh says) is on July 14th. Matt Coupas will be demonstrating baby rattles — three-piece, BB‑filled, turned between centers. They’re a simple project with a few fun challenges and make great baby gifts. Last year Matt donated a dozen to the Anchor Center for Blind Children through the CWG toy drive, and he plans to donate again this year. He’s hoping a few FRW members will join him.

- The next HOW class is on June 16th. The class is Turn a 3-Legged Stool. Turning a stool involves faceplate and spindle turning.
- Our next Group Buy is in July with pickup at the August meeting. Group Buys are once a quarter (Jan, Apr, Jul, Oct).
PHEOG Grant
2026 applications were extended until May 15th, and I’m happy to report we had four lucky recipients! Congratulations to all, and we look forward to seeing what you share with the club for your payback.Remember if you received an award last year you have 1 year to give your payback.
Upcoming Events
- Summer BBQ

 Mark your calendars for June 27th for our annual summer BBQ! It will be at the same place as last year, details and a SignUpGenius link will be sent to members.
American Association of Woodturners 40th International Woodturning Symposium
June 4 – 7, 2026
Raleigh Convention Center
Raleigh, NC Rocky Mountain Woodturning Symposium
What a great Symposium! Mark your calendars for next year:
September 18-20, 2026
Loveland, CO
rmwoodturningsymposium.com/